
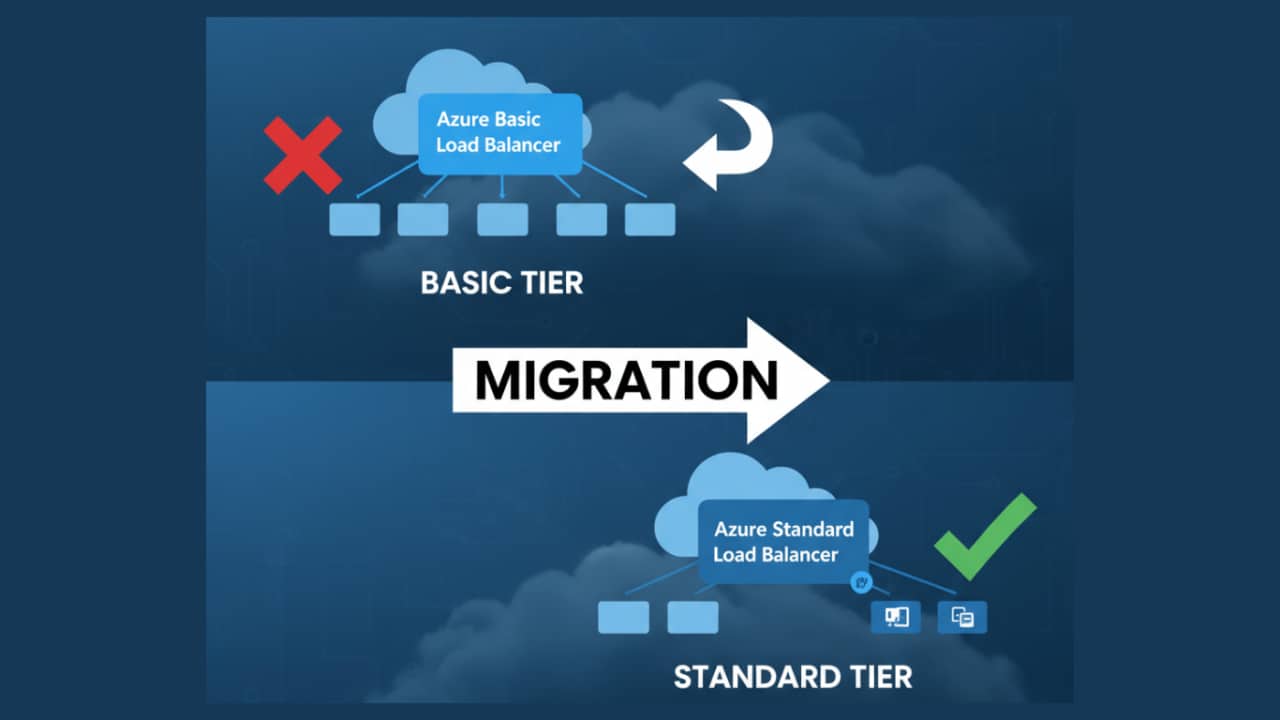
Time to Upgrade: Say Goodbye to Azure's Basic Load Balancer
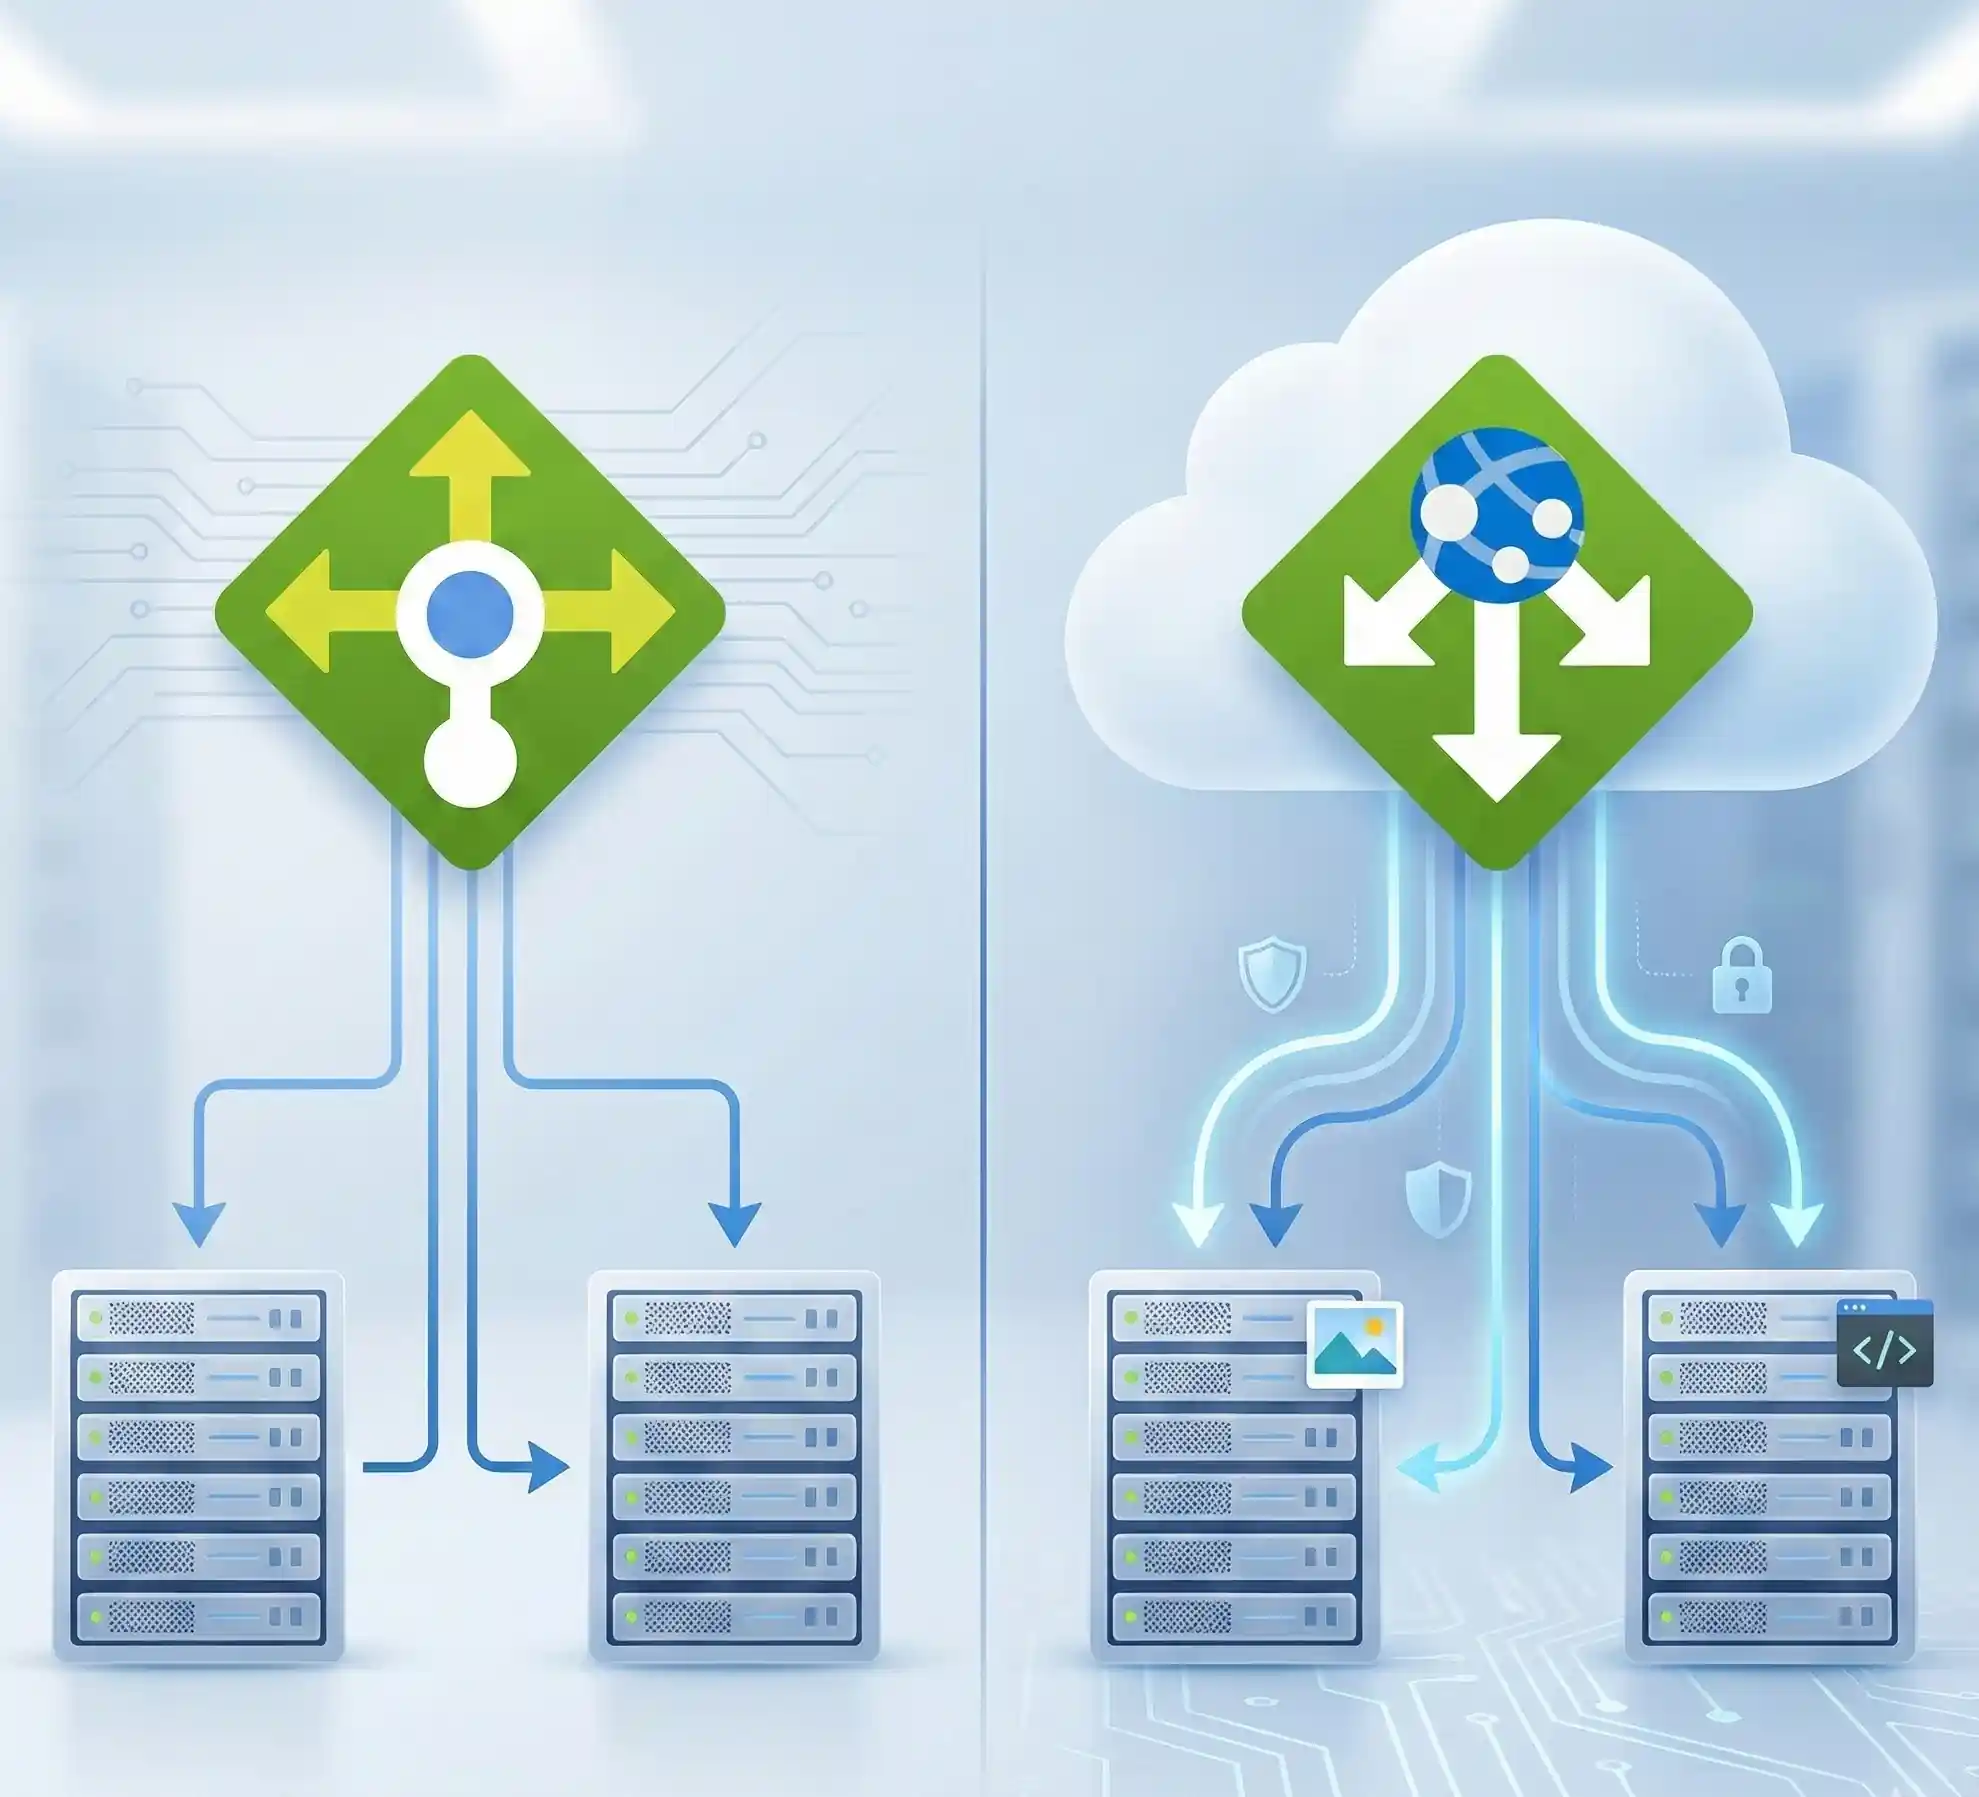
Heads up, Azure administrators and cloud engineers! There's an important deadline on the horizon. On September 30, 2025, Microsoft is officially retiring the Basic Load Balancer. To keep your applications running smoothly and securely, you'll need to upgrade to the much more powerful and feature-rich Standard Load Balancer.
But don't worry, this isn't a complicated manual process. Microsoft has provided a powerful PowerShell script that automates most of the heavy lifting. This article will break down what this script does, when you can use it, and when you can't. Think of it as your friendly guide to a seamless upgrade.
What the Magic Script Can Do For You ✅
The AzureBasicLoadBalancerUpgrade PowerShell module is designed to make your life easier. It intelligently handles the migration from Basic to Standard SKU by performing several key actions.
Here’s a look at the scenarios where this script works perfectly:
- Creates a Safety Net: Before it touches anything, the script backup your Basic Load Balancer's configuration. If anything goes wrong, you have a recovery point.
- Keeps Your IP Address: For public load balancers, the script accordingly updates your existing public IP from Basic to Standard SKU and makes it static, so you don't lose your address. For internal load balancers, it tries to reassign the same private IP.
- Clones Your Configuration: It creates a brand new Standard Load Balancer and copies over all your existing settings—health probes, load balancing rules, NAT rules, backend pools, and tags. It’s a near-perfect clone, just better!
- Moves Your Virtual Machines: The script automatically associates your existing Virtual Machines (VMs) or Virtual Machine Scale Sets (VMSS) with the new Standard Load Balancer. No manual re-wiring is needed.
- Secures Your New Setup: Standard Load Balancers are secure by default, meaning they don't allow traffic unless you explicitly permit it. The script helps by creating and associating a Network Security Group (NSG) to ensure your load-balanced traffic can still reach your VMs.
- Handles Complex Setups: Do you have an application with both an internal and an external load balancer? The script can migrate them together at the same time to avoid conflicts between Basic and Standard resources.
When to Pause and Re-think: Unsupported Scenarios
While the script is incredibly useful, it's not a one-size-fits-all solution. There are a few specific situations where you cannot use this automated process and will need to explore other migration paths.
Do not use this script if your setup involves:
- IPv6 Configurations: The script does not support Basic Load Balancers that use an IPv6 frontend IP configuration.
- Azure Kubernetes Services (AKS): If your Basic Load Balancer is managed by an AKS cluster, you cannot use this script. AKS has its own management lifecycle for networking resources.
- Protected VMSS Instances: If your backend Virtual Machine Scale Set has instances with the
ProtectFromScaleSetActionsinstance protection policy enabled, the script will fail. - Availability Set Issues: If your backend pool members are in an Availability Set, but not all members of that set are behind the load balancer, the migration isn't supported.
- Floating IP on Secondary IPs: If you're using a floating IP on a secondary IP configuration, you must move it to the primary configuration before running the script.
Always validate your scenario first to avoid running into issues midway through the process.
Demo: Let's Get Migrating!
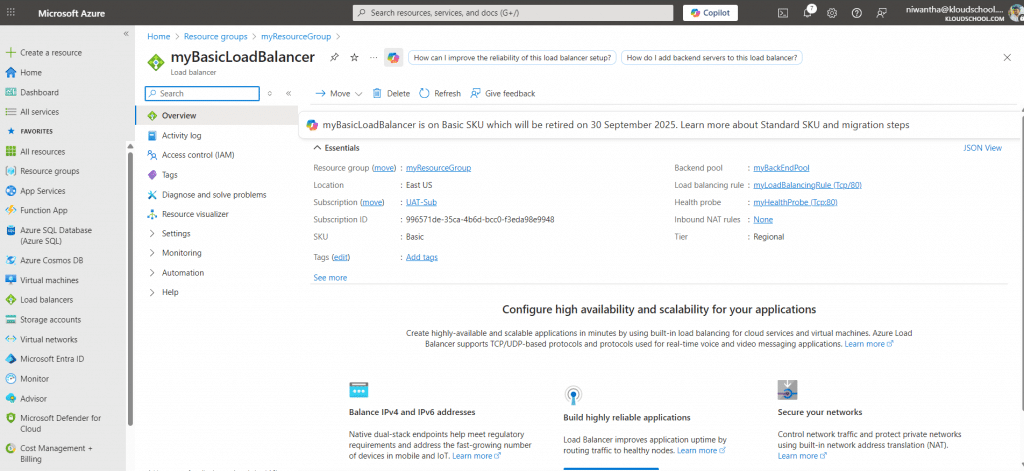
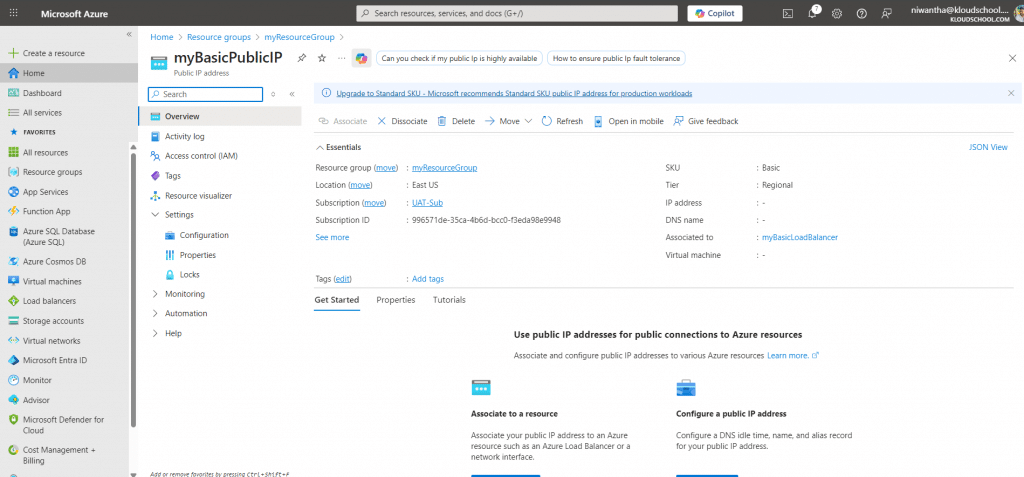
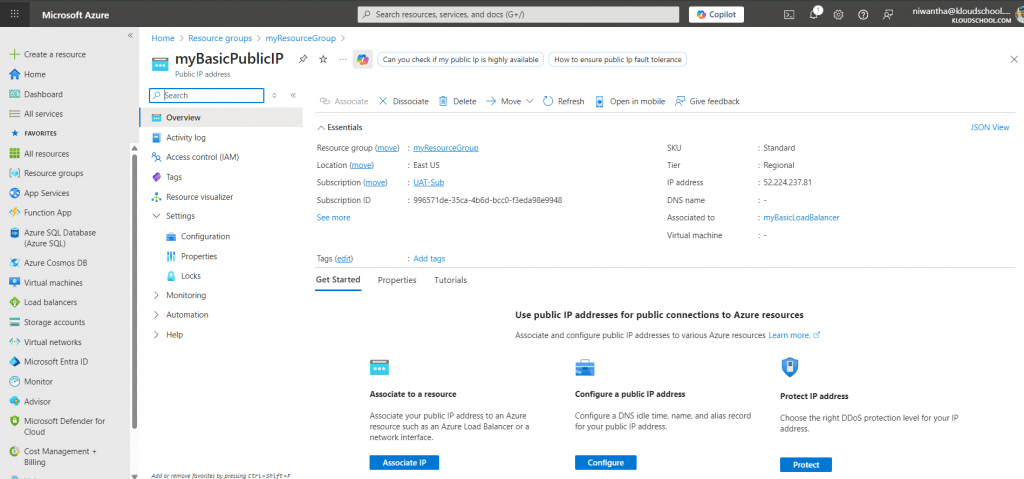
In this section, we will walk through the high-level steps of performing the migration. In the two screenshots below, you can see that we currently have a Basic Load Balancer with a Basic IP address associated with it.
Step 1: Preparation is Key! (Pre-Migration Checklist)
Before you run a single command, it's crucial to prepare your environment. A few minutes of planning can save you hours of headaches.
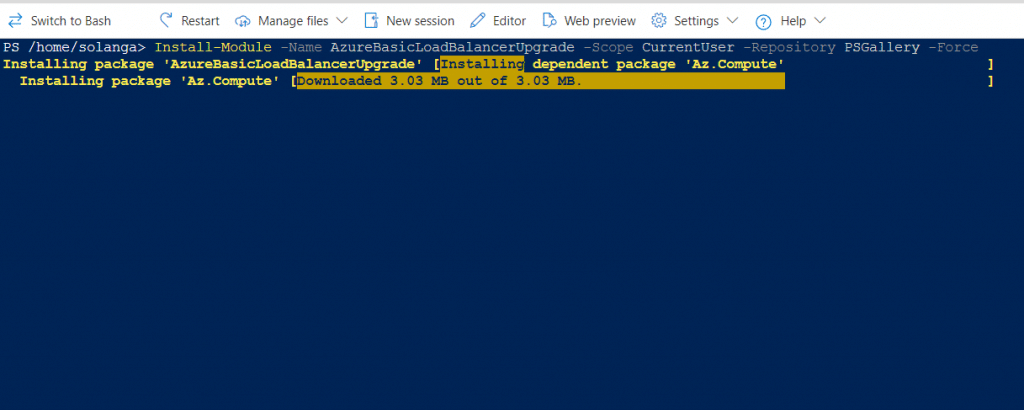
- Install the Module: First, make sure you have the PowerShell module installed.
- Install-Module -Name AzureBasicLoadBalancerUpgrade -Scope CurrentUser -Repository PSGallery -Force
- Plan for Downtime: The upgrade process involves deleting the old load balancer before creating the new one. This means your application will experience a short period of downtime. Plan this during a maintenance window.
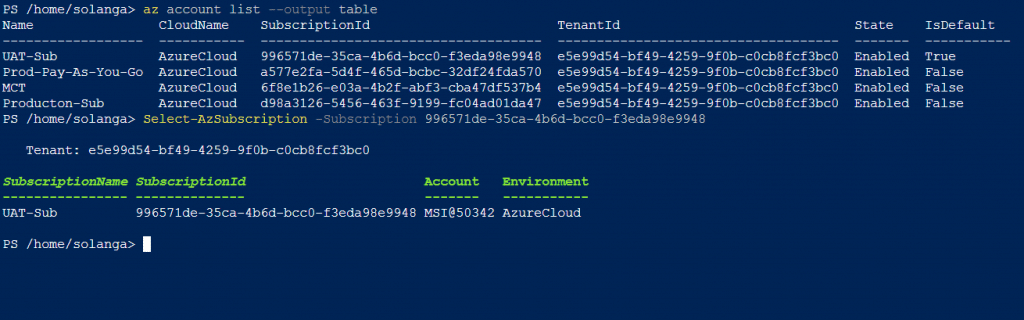
- Select the subscription where the Basic Load Balancer is running.
- Validate Your Scenario: Run the script with the
-validateScenarioOnlyflag to confirm your load balancer is eligible for this automated upgrade. This is a non-destructive check. (Replace Resource Group Name and Basic Load balancer Name)Start-AzBasicLoadBalancerUpgrade -ResourceGroupName -BasicLoadBalancerName -validateScenarioOnly:$true

- Prepare for Outbound Connectivity: Standard Load Balancers require explicit outbound rules for internet access. Plan how you will handle this—either with Outbound Rules on the new load balancer or a NAT Gateway.
Step 2: Running the Upgrade Script
Once you're prepared, running the migration is surprisingly simple. The main command requires just the resource group and the name of your Basic Load Balancer.
PowerShell
Start-AzBasicLoadBalancerUpgrade -ResourceGroupName <loadBalancerRGName> -BasicLoadBalancerName <basicLBName>
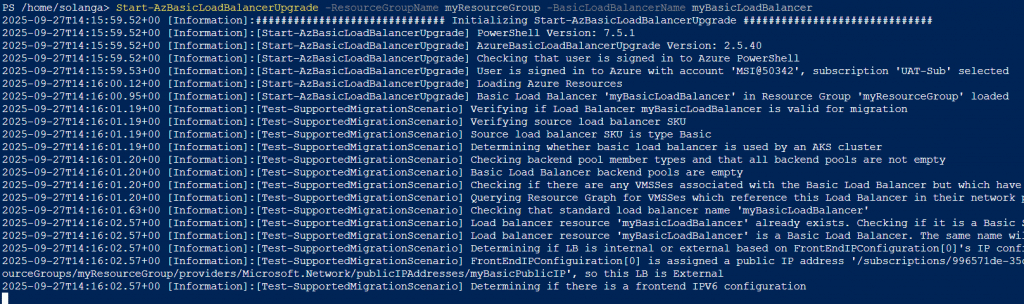
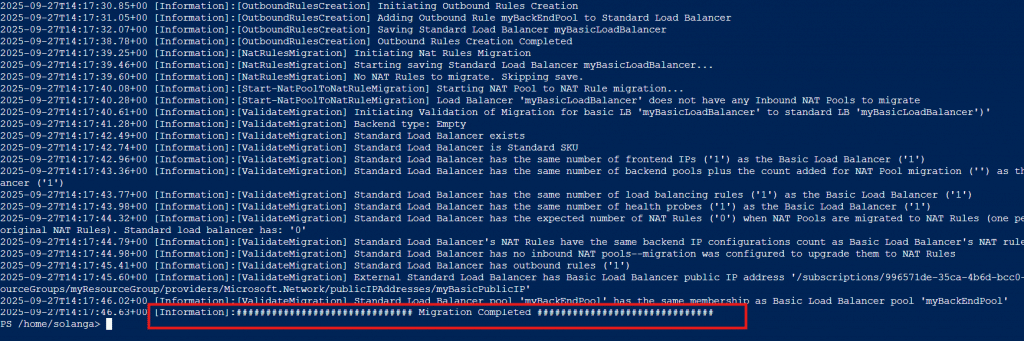
The script will provide real-time updates on its progress, from backing up the old configuration to creating the new one and migrating the backends.
Migration succeeded. ✅
Step 3: Did it Work? (Post-Migration Validation)
After the script finishes, don't just assume everything is perfect. Test, test, and test again!
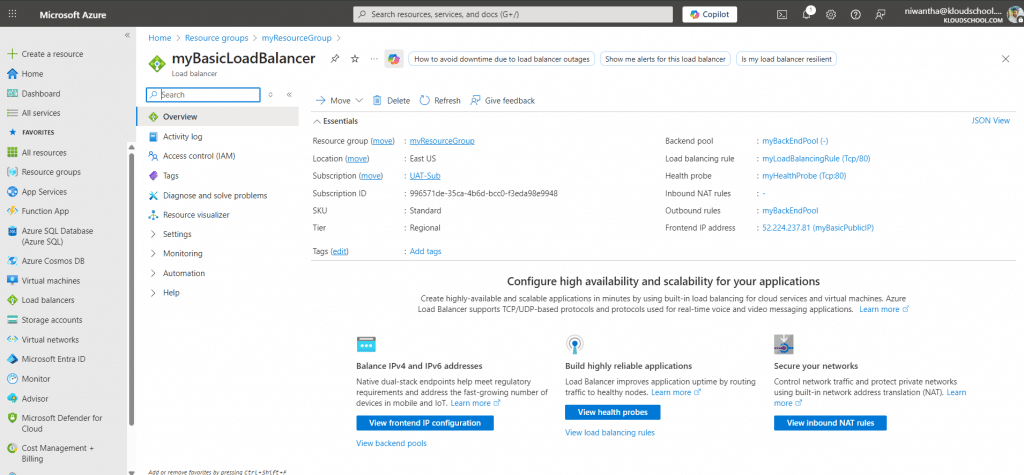
- Check the Azure Portal: Navigate to your resource group and confirm that the new Standard Load Balancer exists and the old Basic one is gone.
- Test Inbound Connectivity: Try to access your application through the public IP address just as your users would.
- Test Outbound Connectivity: Log into one of your backend VMs and ensure it can still access the internet if required.
By following these steps, you can confidently migrate to the more robust and secure Standard Load Balancer well before the 2025 deadline. Happy upgrading!
Note: The Basic public IP address shown here was originally created using Azure Cloud Shell with Bash. Since Basic IP addresses are no longer supported, the IP address does not appear in the current configuration.


No comments yet. Be the first to share your thoughts!